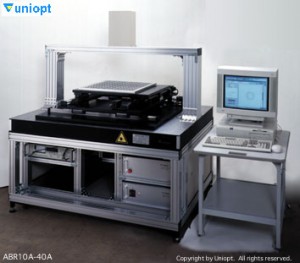
- Overview
The ABR-100 is capable of measuring birefringence and its azimuth with high accuracy. High sensitivity and high accuracy are achieved by using optical heterodyne interferometry. All operations are computerized and menu-driven for easy operation, and the measurement results do not depend on the operator’s skill level. By performing the calibration operation, not only is it possible to perform measurements with higher reproducibility, but also various application measurements can be realized.
By manipulating the sample stage, two-dimensional birefringence (distribution) can be measured. A tilting stage can be installed to measure grazing incidence birefringence. The stage is automatically controlled by a computer. The measurement results are visually represented on a two-dimensional display.
- Features
- High sensitivity, high speed measurement : Adoption of optical heterodyne measurement method, 0.1 sec. / point
- High accuracy, high reproducibility : Measurement with sample stationary Resolution 0.01 nm
- Capable of large sample size : Capable of handling large sample size
- Line mountable : Upgradeable to line mountable by changing sample stage
- Applications
- Liquid crystal displays : Phase difference films, rubbing films, etc.
- Evaluation of orientation characteristics of ferroelectric (antiferroelectric) liquid crystals
- Substrates for magneto-optical disks
- Pick-up optical components for DVD, CD, etc.: Polarizing beam splitters, etc.
- Strain measurement of optical glass such as lens and prism
- High-precision photoelastic constant measurement of optical materials
- Research on polymer materials (thin films, optical elements such as lenses, etc.)
- Performance
Measurement Parameters Retardation Azimuth of axis Measured samples Re δ φ Range 0 - 260 nm 0 - 150 deg. ± 90 deg. Resolution 0.01 nm 0.006 deg. 0.1 deg. Repeatability** ± 0.01 nm 0.006 deg. - Re = 0 nm ± 0.03 nm ± 0.02 deg. ± 0.2 deg. 1/4 wave plate Measurement time 0.1 sec./point (Simultaneous measurement of linear birefringence and circular birefringence) **). The upper column shows the measurement results (σ) for a sample of the air layer (Re = 0 nm), and the lower column shows the measurement results (σ) for a sample of a quarter-wave plate (Re ≈ 158.3 nm crystal).
- Configuration variation
Please see here.

